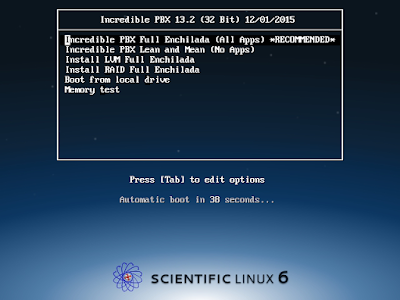
Welcome back to My VOIP LAB. Today we will continue the installation of PBX in a Flash on Oracle VirtualBox. If you followed the screenshots so far, your Oracle VirtualBox should be showing the bellow screen.
VERY IMPORTANT: During the install, you will be asked to select either enable OAUTH for Google Voice or use plain text. Please select Plain Text (option 1) for this.
You should select the recommended option for this.
Select your time zone here
Enter your root password. Please write down your password somewhere!
For Google, select either 1 or 2. I had an issue when this screen came up. It did not allow me to type in anything.. I ended up selecting 1 for the first installation.
Use the user name root and the password for root account you entered earlier.


No comments:
Post a Comment